Why do I need to set JAVA_HOME?
Many Java based programs like Tomcat require JAVA_HOME to be set as environment variable to work correctly. Please note JAVA_HOME should point to a JDK directory not a JRE one. The point of setting the environment variable is to let programs know in which directory executables like javac can be found.
1. Open Advanced System Settings
In Windows 10 press Windows key + Pause Key, This will open the System Settings window. Go to
Change settings and select the Advanced tab.2. Set JAVA_HOME Environment variable
In “System Properties window” click “Environment Variables…”
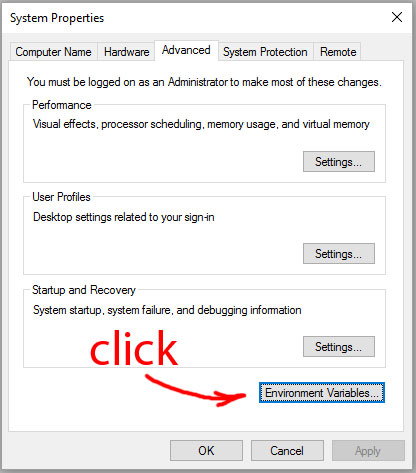
system properties window environment variables
Under “System variables” click the “New…” button and enter JAVA_HOME as “Variable name” and the path to your Java JDK directory under “Variable value”
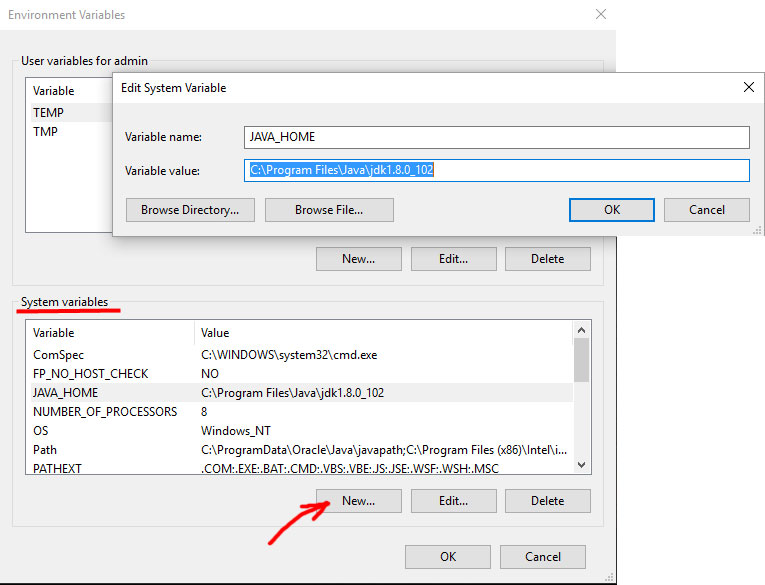
Add JAVA_HOME as system variable
3. Update System PATH
1. In “Environment Variables” window under “System variables” select Path
2. Click on “Edit…”
3. In “Edit environment variable” window click “New”
4. Type in
%JAVA_HOME%\bin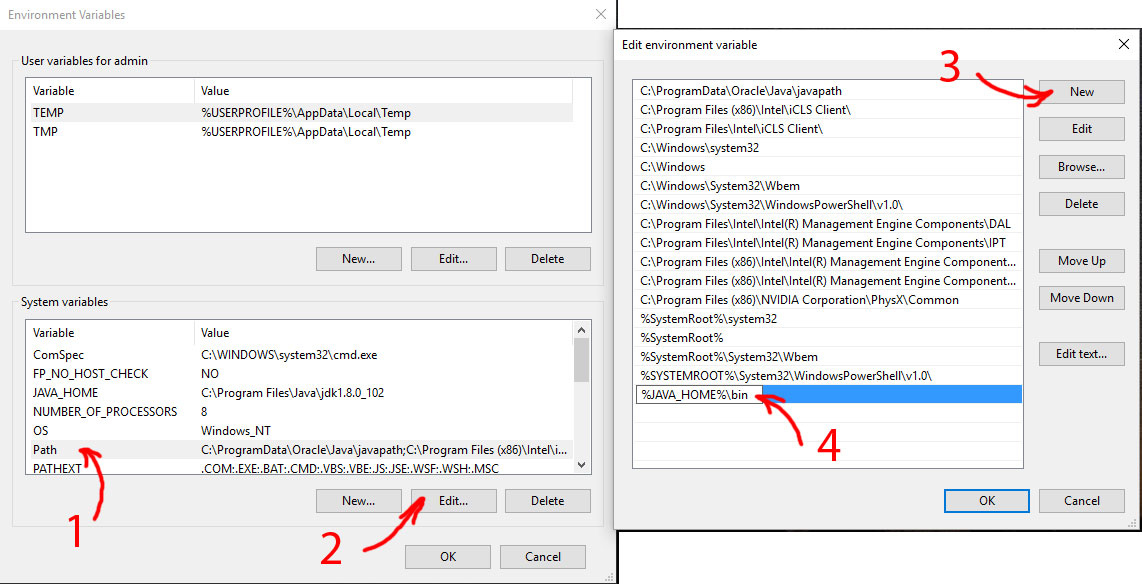
Update system path
4. Test your configuration
Open a new command prompt and type in:
- echo %JAVA_HOME%
this will print out the directory JAVA_HOME points to or empty line if the environment variable is not set correctly
Now type in:
- javac -version
this will print out the version of the java compiler if the Path variable is set correctly or “javac is not recognized as an internal or external command…” otherwise
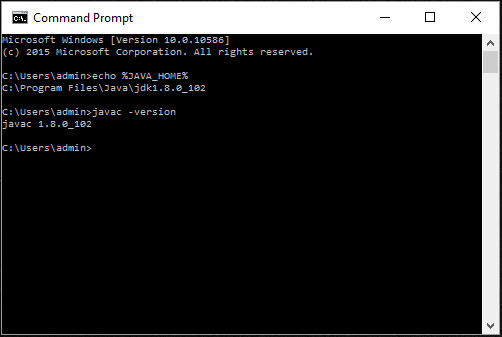
Test JAVA_HOME and system path
No comments :
Post a Comment